Too Faced Peach Perfect Foundation First Impressions

Hello Beauties! Welcome to another post. You might have noticed that I didn’t post on a Friday last week, I’ve had a busy few weeks with house renovations and I just didn’t have the chance to write something worth reading. So today I’m posting a quick first impressions.

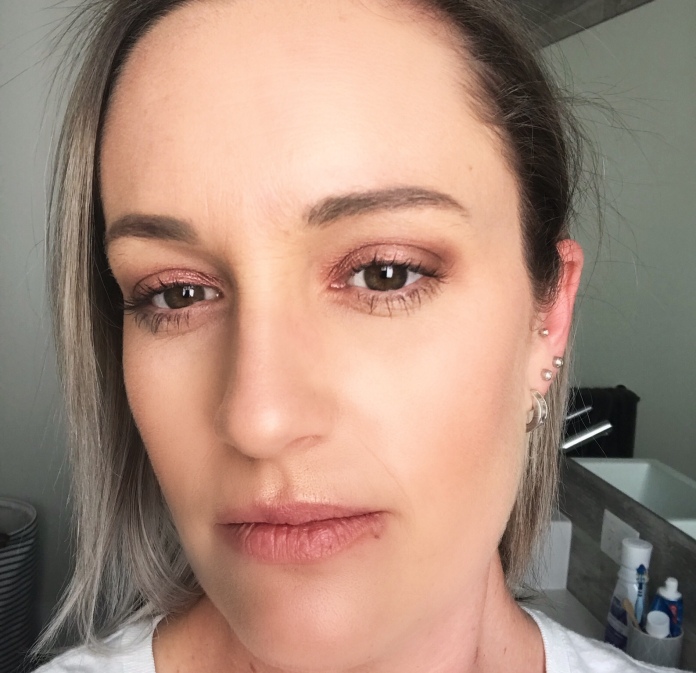
I recently went to a Mecca Maxima store to have my makeup done. I’ve been wanting to try out a new foundation for summer so I thought I’d get colour matched in the Too Faced Peach Perfect Foundation ($52AUD for 48mL available at Mecca). It’s definitely heating up here in Australia and we’ve already had a few days over 30°C so I was wanting something that was matte, long lasting and sweat proof.

I have dry skin so I was advised to use this with a really hydrating and/or illuminating primer to avoid looking like the Sahara desert. Which I have to say, was a great tip. It’s described as a “comfort matte” foundation so it isn’t terribly drying, but on my skin it could be. I was shade matched to the colour Light Beige which is slightly darker than I normally wear, but I’ve been self tanning lately so it’s a perfect match for summer.

I find this foundation best applied with a flat top kabuki or buffing style brush. It may work well for others with a sponge but I prefer the finish with a buffing brush. I’ve been using it every day since I bought it and I’m loving the finish. It’s almost skin like, doesn’t settle too much in my fine lines and lasts. All. Day. I’ve been outside in disgusting heat, sweating up a storm and it doesn’t slide off my face or look ultra shiny. On days where it’s a little cooler I use a Hourglass powder to set my face but on warmer days I use the Mecca Max Banana Powder.
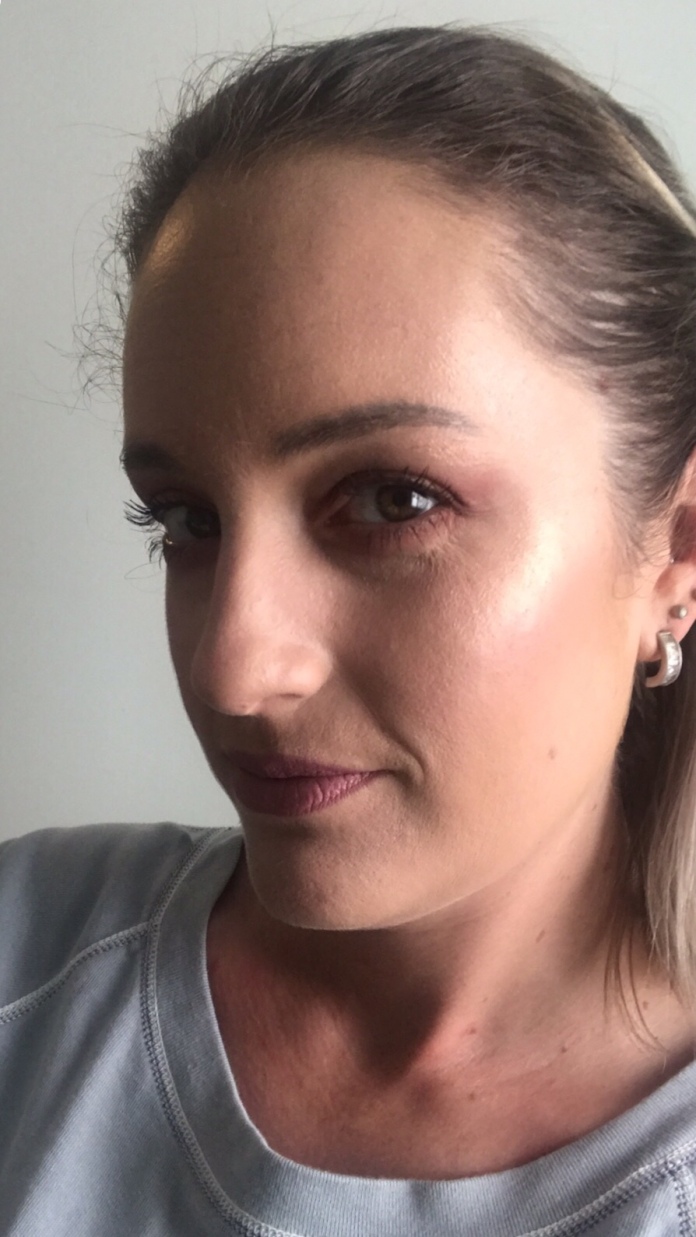
(Natural Lighting)

I only use one pump of the foundation, it’s definitely possible to layer it and build up the coverage, but I prefer a more natural finish. What’s the point of having flawless looking skin if it’s so thick it’s cracked in my smile lines and around my forehead?
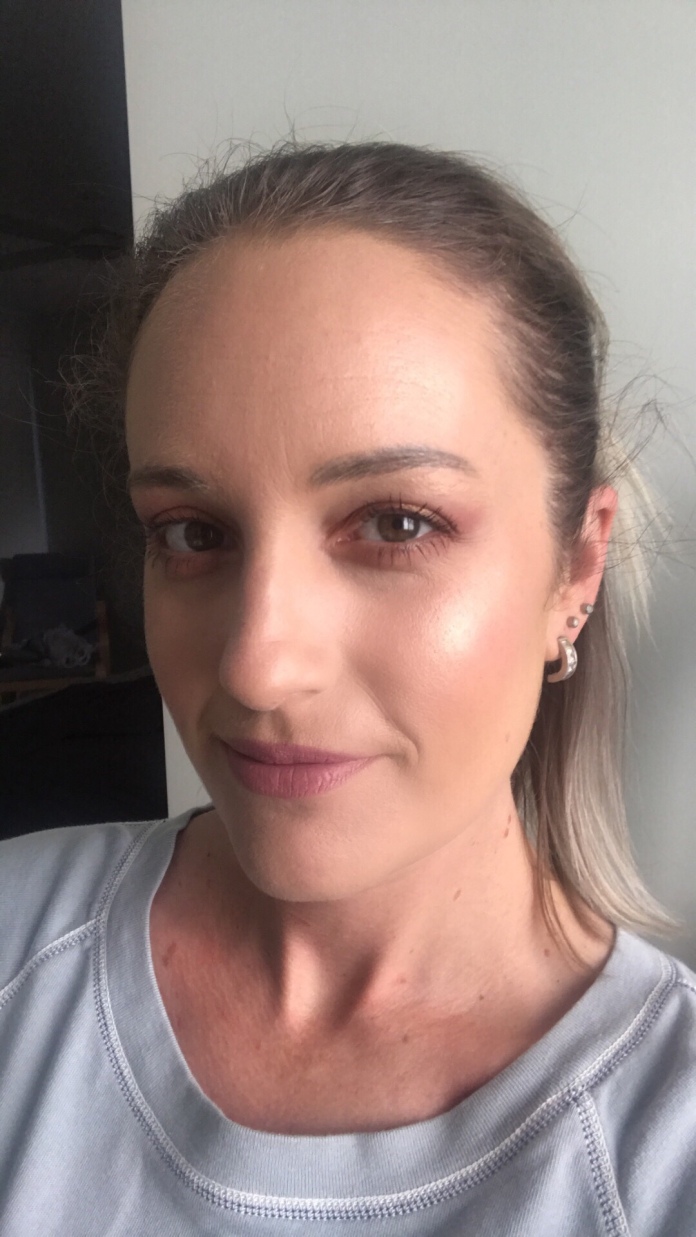
(With a ring light)

I’m so glad I tried this foundation, everyone told me it wouldn’t be suitable because of my dry skin but I think summer is going to be much more comfortable this year now I’ve found something that lasts through the Australian heat.

Have any of you tried this foundation? What were your thoughts? Let me know in the comments below.

Until next time, Beauties xx

Standard

Winged Liner Stamp?!

Hello Beauties and welcome to another post. Today I’m trying out a winged eyeliner stamp because, let’s face it, I suck at winged liner. I’ve tried gels, pencils and pens. I can’t seem to make them sharp enough, let alone even. I’ve tried the tape method and stencils and nothing seems to work. I’ve read and heard great reviews about today’s product so I thought I’d give it a try.

The Quick Flick is essentially an eyeliner stamp. Each set comes with 2 pens, one for the right and one for the left, that have a stamp on one end and a pen tip on the other to fill in the rest of your eyeliner. There are 3 sizes available

  • 8mm Petite
  • 10mm Modest
  • 12mm Grand

Each size is available in 2 colours, Intense Black and Hot Fudge. Black is obviously black and hot fudge is a chocolate brown. They retail for $34.99AUD per set or you can buy multiple size packs ranging from $59.99 – $89.99AUD depending on which pack you purchase. My only negative to this is that each value pack is listed product, meaning you can’t customise it. I’d like the option to be able to buy the same size in the two colours personally.

I purchased the 10mm Modest set in Intense Black. I happened to see a code on Facebook that gave me 10% off so my order was a total of $31.50AUD. Shipping within Australia is free if you choose standard shipping or an additional $5AUD for express shipping. International shipping starts from $5AUD for standard or $10AUD for express but doesn’t include any fees that may incur once it arrives in your country. My order was placed on 25/08/18 and arrived 03/09/18. The packaging was minimal but well presented, which I really liked.

I’ve swatched each side of each pen, as you can see below and while it feathered a bit on my hand it didn’t on my eye. Once it dried it didn’t smudge or move but it was easily removed with micellar water.

Below are pictures of my first ever attempt at using this method for eyeliner. Personally, I’m stoked with the outcome, it’s the closest I’ve gotten to even winged liner in my life. They’re at slightly different angles, so definitely not perfect, but I feel confident I could do this easily in a short period of time with a bit of practice.

Overall, I’m really impressed with the Quick Flick and I’m so glad I gave it a try. I feel like if I got confident using it, I’d get better at free handing with a pen or using gel liner because I’d know at what angle to best place the wing. I’m so happy I got this product to try out and I’m looking forward to using it often. I’ll update you all on my progress so we can laugh at my attempts together.

Do any of you struggle with winged liner? If you have any tips feel free to leave them below, I’d love to see them!

Until next time, Beauties xx

Standard

Microblading Healed – Again

Happy Friday Beauties! Today is going to be my full review on my Microblading experience. You can find my other posts about my Initial Results and my Touch Up Appointment via the links. The reason I wanted to do this was because during my months and months of research I devoured blogs, videos and Instagram accounts looking for reviews that contained a lot of photos of the healing process. I found some, but not a lot, so I thought I’d add one more to the interwebs.

So firstly I’m going to show you a few photos of the healing process after the first appointment. It took exactly 2 weeks for my eyebrows to completely heal. The first 5-7 days they didn’t change much other than to get so intensely dark I felt like I looked like Bert from Sesame Street. Then they started to peel. And it looked like I’d allowed a toddler to fill in my brows. That was the only really frustrating part of the entire process, I could deal with super dark eyebrows, I couldn’t deal with patchy, flaky eyebrows. The first photo is of the night of my my initial appointment and the last is about 3 days before they’d fully healed.

Next up are the photos of them healed, prior to the touch up appointment and then now.

The second time around took about 3 weeks in total to heal, however they never got really patchy or flaky. They healed a lot more subtly and they didn’t get as intensely dark as the first time. I’m in love with my new brows and so happy that I decided to take the plunge and get Microblading done.

When I wear makeup I do still use a pencil for some little spots that just didn’t take, a risk when getting the procedure done, and a gel to keep them in place. With the Microblading though it so easy to fill them in because I have the perfect guide, I don’t need to try and make them match. Without makeup though they look amazing. It’s so nice to be able to go out without makeup on and not feel self conscious in that aspect.

Overall I’m really pleased with my results and will continue to get my brows microbladed. I would recommend seeing Chloe because of the wonderful experience I had with her and I’m looking forward to seeing her again in 12-18 months.

Until next time, Beauties xx

Standard

Mecca Max Beauty Queen Eyeshadow Palette

Happy Friday Beauties! Today I’m writing about my first impressions on the Mecca Max Beauty Queen eyeshadow palette, complete with swatches and a look I did using it. My photography skills are nothing to write home about so the look I’m showing doesn’t do it justice but hopefully the swatches do.

This palette is available from Mecca and retails for $38AUD. It contains 15 shimmer shades and has a product total of 30g. The colours are beautiful and can be used as eyeshadow, blush and highlighter. Mecca is also a 100% cruelty free and vegan brand so another win!

For the swatches I’ve stuck to my usual, using the Mikasa Beauty Quick Change Brush Cleaner, the ELF Eyeshadow Brush and the Smashbox Photo Finish 24 Hour Eye Shadow Primer. Let it be known that this eyeshadow primer is bloody amazing!

The palette doesn’t have shade names so I’m just going left to right, top to bottom row. Please be aware, the arrow on the first pic indicates the shadow is the last in the row, I’d just underestimated how much room I’d need for my swatches. Insert an eye roll here. The shade with the heart underneath is my absolute favourite. Another thing to note is that the brush was dry, so imaging how popping they’d be if you used a wet brush!

There has been no fallout so far with this palette which is effing amazing considering how inexpensive it is compared to the amount of product you’re getting. As a comparison, the Urban Decay Moon Dust palette contains 5.6g (8 shades) and retails for $80AUD. So for less than half the price you’re getting 5 times the amount of product.

The shades themselves are highly pigmented and really easy to work with. They don’t blend out to nothing, they aren’t patchy and I find them to work really well for a total look, not just on the lid. I haven’t taken the plunge and used them as blush or highlighter but I could see myself using some of the shades for highlighter at the very least. Below is a look I did with the palette, using the orange shade, middle row, second from the right.

I think this palette is fantastic for anyone who loves shimmer shades and even people who don’t use them often, you can’t beat the value for money. The quality of the shades are worth a lot more in my opinion. Have any of you tried this palette? What are your go to shimmers? Let me know in the comments below.

Until next time, Beauties xx

*Some links are affiliate links and I may earn a small commission if utilised

**Feel free to use code BEABELL25 for 25% off your order at Mikasa Beauty if you’d like to save some money

Standard

Urban Decay Backtalk Palette Review

Good Morning Beauties! Today I’m talking about my take on the Urban Decay Backtalk palette. I’ve had this for about 6 weeks now and I’ve been meaning to write a post about it for awhile but I keep pushing it aside for other posts so today it finally gets a turn.

I bought this from Mecca and it retails for $78AUD. It contains 8 eyeshadows and 4 cheek products. 3 of the eyeshadows are matte, 2 are satin and 3 metallics. The cheek products are broken up into 2 blushes and 2 highlighters.

(Image Source: http://www.mecca.com.au)

I’ve really been enjoying this palette for a more girly look. It’s a lot more cool toned than a lot of popular palettes at the moment and each look turns out very soft and pretty, in my opinion. The highlights work perfectly and the blushes are beautiful too. I’m more inclined to use Cheap Shot as an eyeshadow, mainly because I’m so fair and it’s quite a shimmery blush. I love that the palette can be used as an either or and it would be great for travel to have a few options if this colour scheme is up your alley.

Another thing I love about it, is the detachable mirror. I can have the palette flat on my vanity or makeup table and still hold the mirror at the angle and with the lighting I want. Also another bonus for travel. The shadows blend really well and the pigmentation is great. The shimmers and metallics aren’t as intense as other shadows I’ve used but they work well with a wet brush or applied using your finger. If you use a dry brush it makes a great everyday/work look. Below are a few looks I’ve created with this palette.

Have any of you tried the palette? What were your thoughts? Let me know in the comments below.

Until next time, Beauties xx

Standard

Microblading Touch Up Appointment

Happy Friday Beauties! Today will be another short post. I wanted to write a quick post about my touch appointment with the lovely Chloe from The Lotus Institute. My appointment was last Friday, the 20th July.

The appointment was loads different from my first one. Not only was it shorter but it was almost zero pain compared to the first. My eyebrows had healed quite well so only a few spots were needing to be filled in or added to.

Here’s a photo before the appointment

One thing I noticed straight away was the fact that I didn’t have any residual pain that evening like I did the first time. I’ve also noticed that they haven’t intensified in colour either as they’re healing and they’re much less itchy.

Here’s a photo a few hours after my appointment

I’m going to do a more in depth post once they’ve healed again with photos of the first 2 weeks as they healed initially. I haven’t taken daily photos this time as they haven’t changed from that evening, I will though if they do start to look vastly different.

As it’s advised not to get your eyebrows wet for about 5 days, I haven’t washed my face properly since Friday and I feel gross, so I’m now off to give my face a good scrub and wash my hair.

Have any of you taken the plunge yet? Let me know in the comments below.

Until next time, Beauties xx

Standard

Maybelline MasterChrome Metallic Highlighter Review

Happy Friday Beauties! Today I’m off to get my Microblading touch up appointment done so this review will be a little shorter than normal. Let’s be honest, a highlighter either works or it doesn’t, there’s not a lot you can elaborate on past that.

This highlighter has been available in the US for awhile now. In fact it has multiple shades available, but here in Australia we have only had this one for a couple of months and have the original shade; Molten Gold. It contains 6.7g of product and retails for $19.95AUD at Priceline.

Off the bat, I thought this would be too dark for my skin tone. It’s a proper gold, but I’ve read and watched such great reviews online that I wanted to give it a try. The first time I used it I hadn’t even swatched it so I wasn’t sure of the texture or how powdery it would be. When I first went in with the brush there was quite a bit of fallout, I was worried. I thought this was going to just look like straight glitter on my face.

I applied it to the cheekbones and cupid’s bow and thought holy hell what have I done. However, after buffing it in with the brush I was really impressed. It looks, in my opinion, really nice and almost natural. Instead of being a strip of glitter across my face it gives that sheen, almost like a wet look. Upon reading the directions to apply on the back of the packaging I discovered that you are in fact supposed to buff this in, so for the 274658373rd time in my life, I should have read the directions first *eye roll*

Below is a picture without any filter in direct sunlight through a window. I’m loving the effect it creates.

Have any of you tried this highlighter? What were your experiences? I’d love to know in the comments below.

Until next time, Beauties xx

Standard

MAC Strobe Cream Review

Hello Beauties and welcome to another post. Today I wanted to talk about another product I received in my Mecca Beauty Loop box, the MAC Strobe Cream in Pinklite.

I received this in the Sized To Go size and the shade Pinklite (the original shade). It’s now available in 5 shades full sized at the MAC website and 3 shades on the Mecca website. The tube I have retails for $20AUD and contains 30mL, which is a standard foundation amount if you need a comparison. The full size tube retails for $56AUD and contains 50mL, so if you prefer the original shade it’s actually better value for money to buy the smaller size, if you’re buying from Mecca at least. It claims to provide a complete complexion overhaul, boosting the look of dull skin. Below is a swatch on my arm, photo taken with a small ring light.

I prefer a glowy/dewy makeup look, as I have dry skin and am starting to see more fine lines and wrinkles. I thought this would be perfect to use under foundation to add a bit of glow, especially under more matte looking foundations. According to the directions you can also apply this over foundation with either your fingertips or a brush, but I honestly feel it would be too much. I applied it over my entire face prior to foundation and the below look is the result.

I have to say, I don’t dislike the way my skin looks. Being quite reflective I’m surprised it didn’t emphasise texture anymore than any other creams I’ve put on under my foundation. It did change the foundation from looking quite matte and cakey at the end of the day to more of a sheen finish which was nice. However, be warned. When first applied you will look like something akin to the tin man. It’s really reflective. You could sort of see around and in my eyebrows during the day, a slight grey/metallic looking pigment. When I use this in the future I’ll be sure to avoid that area and perhaps use a brush or a sponge rather than my fingertips.

I’m undecided if I would purchase this in the future, I’m reserving judgement until I’ve finished this tube. I’d like to play around with it a bit more before taking the plunge and recommending the product to anyone doing their research on it. I didn’t experience any irritation or breakouts, it didn’t break up my foundation or anything bad, I just don’t know if it did enough to say “oh my gosh buy this NOW!”

Have any of you tried this cream? What were your thoughts? Let me know in the comments below.

Until next time, Beauties xx

Standard

Mecca Cosmetica Transforming Facial Cleanser and Hydrating Moisturiser First Impressions

Happy Friday, Beauties! Today I’m bringing you a first impressions on the Mecca Cosmetica Transforming Facial Cleanser and Hydrating Moisturiser. I received a sample size of these products in my Beauty Loop box from Mecca a few months ago and I’ve been keen to try them out, but also trying to pan a few products so was waiting until I’d finished my most recent cleanser to give them a go.

First up let’s talk price and size. The cleanser contains 80mL and retails for $32AUD. This is a generally fair priced cleanser compared to others I’ve tried. The moisturiser contains 50mL and retails for $48AUD. I’ll be honest, this seems a bit high for the amount you get and I know there are cheaper alternatives at the drugstore.

(Image Source: http://www.mecca.com.au)

(Image Source: http://www.mecca.com.au)

The sample size I received were in a sachet, which I have a love hate relationship with. I love the fact that I can trial products and get a bit of an idea on how they work before I purchase a full size but I hate that you either tear the crap out of the sachets and lose half the product as it spatters around your bathroom (just me?) or if they’ve been generous with the amount you have to leave it open and exposed to get multiple uses. I know that is such a first world problem but that’s my take on sachets.

I really enjoyed both of these products. The cleanser is a gel consistency, it didn’t foam or lather but it also left my skin feeling properly cleansed without drying it out. I often find with cream or gel cleansers they just feel like I’m rubbing a moisturiser over my face and it isn’t actually doing anything. Not with this one though, it felt really nice. It has a rose scent, that I’m sure I’ve smelt somewhere before but I cannot for the life of me place it. It wasn’t overpowering just a nice fresh scent.

The moisturiser was amazing. I wanted to give it a good go so I didn’t use any of my serums with this. Basically I wanted to see if it could stand its ground, alone. Which it did. My face still felt thoroughly moisturised and velvety soft at lunch time the next day. A little went a long way, the sachet was enough for my face, neck, décolletage and shoulders. While the full size is fairly expensive, I think it would last quite a few months, especially in summer. It also had a rose scent and left me feeling and smelling amazing. It is thicker, like a night cream, so possibly not something to use in the mornings if you have oily skin but I would definitely recommend for night use and/or those of you with dry skin.

Overall, I’m definitely considering purchasing these two products in full size when I’m up for a new cleanser and moisturiser. I have a few in my bathroom cupboard to use up first but if I do end up purchasing these I’ll do an in-depth review once I’ve used them for a month or so.

Have any of you tried this cleanser and moisturiser? What did you think? Let me know in the comments below.

Until next time, Beauties xx

Standard

Dr. Dennis Gross Alpha Beta Universal Daily Peel Review

Hello, Beauties. Another Tuesday, another post. Today, as the title suggests, I want to talk about the Dr. Dennis Gross Alpha Beta Universal Daily Peel. I received a 3 day sample of this in my Beauty Loop box in February from Mecca. It has taken me awhile to get around to using it but I’ve finally had the chance and wanted to get it out while it’s still fresh.

The product itself contains 2 pre-soaked wipes, to be used as a 2 step treatment. You can purchase them in a 5 day pack for $24AUD, a 30 day pack for $129AUD and a 60 day pack for $220AUD. The 60 day pack works out to be the best value overall, however the 5 day pack is reasonably priced to get a gauge for the product and see how your skin reacts to the product. The above prices and sizes are the ones available at Mecca.

The first step in the program is the Exfoliate and Smooth wipe and the second is the Anti-Ageing Neutraliser. Directions advise to massage the first step into clean, dry skin until the wipe is no longer wet. Wait for two minutes then follow the same directions with the second wipe. It also advises to follow up with a serum and moisturiser.

I’ll be honest, maybe I expected too much of this product or maybe my 3 day sample wasn’t an adequate length of time, but I’m not entirely sure I noticed enough of a difference to repurchase these. My skin did feel smoother after using them but not entirely smooth and it didn’t look smoother.

I didn’t have any adverse reactions or irritation using the wipes, a slight tingling sensation when using the first step was my only difference in using other exfoliators or serums. It didn’t smell unappealing but it also didn’t smell amazing. There’s a scent to it but it isn’t offensive or overwhelming.

I feel like this might be one of those products that take longer than a “sample size” to work but the investment into a long enough trial is huge. If I had endless amounts of disposable income I probably would give the 30 or 60 day packs a go, but at the moment it isn’t the kind of money I’m willing to invest into a product I don’t know works well.

I will say, the reviews I’ve read online are mostly positive. An average of 4.5 stars out of 256 reviews on the Mecca website. From what I’ve read, commonly people will use these wipes for 30 or so days until their skin is in peak condition and then scale it back to 2-3 times a week, effectively eking out the time you have to use the wipes. Something to consider if, like me, you’re weighing up whether or not to purchase a full size.

Have any of you tried this peel or other products from the Dr. Dennis Gross line? Let me know in the comments below.

Until next time, Beauties xx

Standard