Microblading Healed – Again

Happy Friday Beauties! Today is going to be my full review on my Microblading experience. You can find my other posts about my Initial Results and my Touch Up Appointment via the links. The reason I wanted to do this was because during my months and months of research I devoured blogs, videos and Instagram accounts looking for reviews that contained a lot of photos of the healing process. I found some, but not a lot, so I thought I’d add one more to the interwebs.

So firstly I’m going to show you a few photos of the healing process after the first appointment. It took exactly 2 weeks for my eyebrows to completely heal. The first 5-7 days they didn’t change much other than to get so intensely dark I felt like I looked like Bert from Sesame Street. Then they started to peel. And it looked like I’d allowed a toddler to fill in my brows. That was the only really frustrating part of the entire process, I could deal with super dark eyebrows, I couldn’t deal with patchy, flaky eyebrows. The first photo is of the night of my my initial appointment and the last is about 3 days before they’d fully healed.

Next up are the photos of them healed, prior to the touch up appointment and then now.

The second time around took about 3 weeks in total to heal, however they never got really patchy or flaky. They healed a lot more subtly and they didn’t get as intensely dark as the first time. I’m in love with my new brows and so happy that I decided to take the plunge and get Microblading done.

When I wear makeup I do still use a pencil for some little spots that just didn’t take, a risk when getting the procedure done, and a gel to keep them in place. With the Microblading though it so easy to fill them in because I have the perfect guide, I don’t need to try and make them match. Without makeup though they look amazing. It’s so nice to be able to go out without makeup on and not feel self conscious in that aspect.

Overall I’m really pleased with my results and will continue to get my brows microbladed. I would recommend seeing Chloe because of the wonderful experience I had with her and I’m looking forward to seeing her again in 12-18 months.

Until next time, Beauties xx

Standard

Microblading: Results!

Good Morning, Beauties and welcome to another post. Today I wanted to share my experience getting my eyebrows microbladed. This will just be my initial thoughts on the process and results, with another post to follow once I’ve had my touch up and they have fully healed. Let’s get into it.

I had my appointment on Friday, June 22nd at the Lotus Institute with Chloe. I had organised a numbing cream prior to my appointment and applied it 30 minutes before. I was also advised to get an ointment to aid the healing process. Both of these were at my own cost. Chloe currently has a special running where the procedure is reduced to $350AUD (at this stage there isn’t an end date for the special) so it wasn’t an issue paying for the additional products, for me.

I was so excited leading up to Friday, I couldn’t wait to get them done and see the results. Waking up on Friday morning I was a bundle of nerves and started to have a bit of anxiety about the whole thing. I knew Chloe did great work, she was really informative and reassuring at my consultation and I was expecting it to be painful. But I still started to feel apprehensive.

Once my appointment started, Chloe began by talking me through the process, explaining colours and shapes and having a consent form signed. Once we had discussed everything and chosen a colour she started mapping out my brows. I had shown her photos of her own work that I really liked, I wanted them to look natural and full but not over the top. She told me that she prefers to work within someone’s natural shape as it looks much better once it’s all healed and even as it starts to fade down the track.

When my brows were completely mapped out and Chloe had filled them in with a pencil she asked me to take a look in the mirror and see if I liked the shape, size and length. I will admit, looking into that mirror I internally freaked out a little. They were SO bold. I sent a Snapchat to my sister asking what she thought and her response was NOPE. I laughed and explained to Chloe and she told me that was just the outline and shape, not the final result and they wouldn’t look anywhere near as hectic when she was done.

So then I lay down and Chloe got started. I won’t lie, it did hurt. It was unbearable and it didn’t last but it did cause my eyes to water. A lot. Which they do anyway whenever I’ve had any sort of lash procedure done so I wasn’t too concerned. Weirdly, some cuts made me sneeze and others didn’t. I found that the right side hurt more than my left, which Chloe said was a bit different as it’s usually the other way around for most people.

The actual procedure was over quite quickly, the majority of my appointment was the information and mapping out stage. In total my appointment was 2.5 hours and I’d say 45 mins to an hour was the procedure. Chloe was great during the entire thing, she put on some music that I liked and we talked about life in general. She was really good at putting me at ease without even trying. We checked the shape to see what I thought before she applied some final strokes and some ointment to protect them, then we were done.

My eyebrows and the surrounding area were a little tender as I was driving home, not with my face at rest, but if I moved it while I was talking (or doing car karaoke). That night though, they were sore. It felt a little bit like burning/irritation, which is to be expected, I mean I’d just had a blade sliced across my face multiple times. It wasn’t so unbearable I needed to take any pain relief and it also didn’t impede sleep. The next morning there was no pain whatsoever.

I will go more in depth in my final post about the following days, but for right now they’re super dark and a touch itchy. It isn’t driving me bonkers or anything, the colour is more thought provoking than the itching. And it will fade about 50% once they’re healed so I’m not worried.

I’m really REALLY happy with the final results. They look amazing and really natural. I’m so impressed with Chloe and the entire experience and I wouldn’t go anywhere else. I’m really looking forward to being able to forgo doing my brows each day, or leave the house and still have brows without makeup.

If it’s something you’ve been considering I would highly recommend it. Do your research and find someone you’re comfortable with. Troll through their work portfolio, whether it be on social media or otherwise. Be specific about what you do and do not want. Most importantly, only do it if YOU want to. Don’t let me, or anyone else in your life, tell you this is something that you need. I’ve wanted this for a long time and I feel amazing after getting it done. I did this for me. Like any sort of cosmetic procedure, it should make you feel good in the long run.

My touch up appointment is scheduled for mid-late July. I want to do an in depth post on the entire healing process from start to end so it probably won’t be ready until early August sometime. I’m really looking forward to writing it.

Until next time, Beauties xx

Standard

Project Pan?

Hello Beauties, welcome to another week and another post. One thing that I’ve come to realise during my self imposed no buy is that I actually have quite a bit of makeup that I either don’t use because I forgot I owned it or I just don’t enjoy it that much. So I’m planning on doing a project pan, of sorts. I’m going to aim to have used up these products by the end of the year. I don’t want to limit myself to one type of product to use for the next X amount of months, but I would like to see them gone as 2018 is ending. Which seems like a long time away, yet here we are almost into May. I can’t even.

The products I’m putting into the project do work as well as they can. My intention with this post isn’t to deter you from buying any of the products mentioned. Nothing I’m putting in is terrible or not worth the money, they’re just products I’ve found better versions of, for me personally, or things I just know I won’t gravitate towards in the future. I’m going to list them in the order I’d use them in my routine, there are some skincare as well as makeup. Without any further adieu, let’s get listing.

First up is the Artistry skincare products. I’ve already used up the Fresh Softening Lotion, so I’ll be concentrating on the Eye and Lip Makeup Remover, Fresh Foaming Cleanser, Refreshing Eye Gel Cream and the Replenishing Moisture Cream.

All of these products work well and do their job amazingly. Before using these products my skin was a train wreck and when I started my blog I actually said I wouldn’t be switching to anything else. Oh how naive I was. The reason I want to use these up is because I’ve since discovered a brand that uses natural, organic ingredients that cost quite a bit less and last longer and give me the same results.

Next up is a primer, the Stila One Step Correct Primer. This primer is actually really nice. It’s cooling on the skin, it moisturises and leaves a slightly tacky finish. However, it doesn’t provide any of the colour correcting benefits it claims, in my opinion. If I were to purchase another primer from this line I’d stick to one that provides nourishment, hydration or an illuminating finish. There are just other brands and formulas out there that I enjoy more.

Another primer is the Artistry Exact Fit Beauty Balm Perfecting Primer. This product, again works nicely, however there are other primers out there that are just as effective for less than the cost of this one. I actually like to use this one almost as a B.B. Cream as it has a slight tint to it, for the days I don’t feel like doing a full face, which is probably how I’ll use this up.

Moving onto foundation, specifically the Artistry Youth Xtend Lifting and Smoothing foundation in Natural. This Foundation was the first one I ever used that didn’t make me look cakey, didn’t cling to dry patches or make me look like an Oompa Loompa. The only reason I want to use it up is because I’ve found 2 other foundations that work just as well, if not better, for less money that I’ve really been enjoying.

Now onto concealers. I have 2 I’d like to use up, which hopefully won’t be as difficult as I think it’ll be. Firstly the Artistry Exact Fit Perfecting Concealer in Light/Medium and the Maybelline Fit Me concealer in Light. Both of these concealers work well enough for me and my skin type. They both crease and neither completely cover my dark circles, but they do enough. I have fine lines under my eyes, everything creases. I stay up way too late and get up early, I’ll always have dark circles. These aren’t the reasons I’m letting them go, my main issue with the both of them is that they have a yellow undertone and neither suit my complexion. I can make them work but I prefer something that suits my more rosy undertone.

Second to last I have the Artistry Exact Fit Perfecting Loose Powder in Light. This powder works well to set the face, however it also has a yellow undertone, in my opinion, and isn’t as finely milled as other powders on the market for a smaller price tag. I specifically can’t use this powder to “bake” as it leaves me looking extremely dry and cakey around the eyes. I mainly use a big fluffy brush in this powder to set my face. It will be a struggle to use up as it contains 25g, I’ve already owned it for 6 months and have barely made a dent.

Lastly is the Real Techniques Brush Cleansing Gel. Again, this product works well but it’s quite thick so I find I’m often using too much and because of this my brushes require quite a lot of rinsing. There are much more affordable ways to clean your brushes, using baby shampoo or even natural cleansers. The scent of this one is nice but for some it could be overpowering, especially as it lingers on the brush long after they’re cleaned.

Are any of you doing a project pan? What are some of the products you want to see gone? Let me know in the comments below!

Until next time, Beauties xx

Standard

Travel Makeup Bag – What I packed vs. What I Used

Happy Friday Beauties! Today I wanted to sit down and write about makeup and travelling. As the title suggests, I pack a lot and usually end up using only half of what I take with me. This goes for everything in my suitcase, clothes, shoes, underwear. You get the picture. I overpack and curse myself every trip trying to Tetris everything back in at the end of my trip. Maybe one day I’ll learn that I don’t need so many options. Honestly though, I probably won’t learn. Ever.

So I started off with good intentions. I was gifted a beautiful Kikki.K bag by my best friend. It’s massive for what it is, contains 4 inside pockets and a lot of room inside, but still wouldn’t have fit all of my makeup plus skincare, so I also purchased 2 x 2 packs of travel sized bottles from Kmart to decant what I could to save on space. They were AUD$6 and a lifesaver.

(image source: Kmart.com.au)

As far as skincare went, I decanted my makeup remover, cleanser and toner into these 100mL bottles and they fit perfectly. I ended up packing;

  • Makeup Wipes (generic brand)
  • Cotton Pads (generic brand)
  • Artistry Eye and Lip Makeup Remover (decanted)
  • Artistry Hydra-V Fresh Foaming Cleanser (decanted)
  • Artistry Hydra-V Softening Lotion (decanted)
  • Urban Decay Quick Fix Hydra-Charged Complexion Prep Priming Spray
  • Just A Dash Beauty Hyaluronic Acid Serum
  • Artistry Hydra-V Refreshing Eye Gel Cream
  • Artistry Hydra-V Replenishing Moisture Cream (deluxe sample sized pot)
  • Mecca Cosmetica Lip De Luscious in Peach Shimmer

Next up was the makeup, I packed as lightly as I could and tried to incorporate products that were multi use to avoid excess;

  • Mecca Cosmetica Lit From Within Illuminating Primer
  • L’Oréal Infalliable Pro Glow Foundation in Nude Beige 203
  • Maybelline Fit Me Concealer in Light 10
  • Artistry Exact Fit Perfecting Loose Powder in Light
  • Hourglass Ambient Lighting Edit Vol. 3
  • Too Faced Chocolate Chip Palette
  • Physicians Formula Butter Bronzer
  • Maybelline The Colossal Volum’Express Mascara in Black
  • Mecca Max Brow Guru Control Gel
  • NYX Micro Brow Pencil in Espresso
  • Maybelline Brow Satin Duo in Medium Brown
  • MAC Prep + Prime Fix +

I also needed to pack the tools of the trade;

  • Nude By Nature Essential Collection Brush Set
  • Sports girl Fan Brush
  • ELF Small Tapered Brush
  • ECO Tools Spoolie
  • Makeup Sponge (generic brand)
  • GlamO Tri Fold Mirror

By the end of these lists you’re probably wondering how the hell I fit everything into that bag. Let’s be honest, I didn’t. Due to the size of the skincare products I couldn’t decant, plus the usual suspects like toothbrush, toothpaste, floss, mouthwash and deodorant, there was no way I was able to fit it all in. However I did have my previously loved makeup bag that I could use, which I did. I think it came free with a Harper’s Bazaar magazine about a year ago. The brush set also came in it’s own little carrying case.

You’re also probably wondering why I packed a mirror. I went away on a girls weekend with my Mama Bear and Sister, so 3 of us sharing a bathroom and trying to all get ready at the same time wasn’t ideal to me and I figured an additional mirror couldn’t hurt.

This time, for the first time in my life, I used everything that I had packed bar the foundation. That’s because while we were waiting for our flight my sister and I were browsing the MAC counter (before heading to the lounge for wine time) and our mother generously bought us a new foundation each. The girl at the counter suggested I get the Studio Sculpt foundation (NW20 if anyone is interested). So I used that while I was away and I think I’ll give it a good month before I review it. This also meant I had one extra product to try and jam into that bag on the way home.

I think the next time I go away I won’t pack an additional bronzer, the palette I took has one in it, it’s just a bit on the dewier side but it would have meant some precious room available had I left it behind. I also think that I could have probably done without so many brushes, or could have swapped out the ones in the set I don’t use daily with ones that I do. Overall, there were things I could have left behind in order to make space or to just limit the amount of products I took in general but I did like that I didn’t have to settle for a product or wish I’d brought something else.

I also think that I just have to accept the fact that skincare and dental hygiene take up a lot of space and therefore I’m going to need a makeup bag and a skincare bag. My husband is the lightest packer on the planet so at least I know there’ll always be room in his bag if I need it.

What are your travel essentials? Do you over or under pack? Let me know in the comments below.

Until Next Time, Beauties xx

Standard

Ride or Dies

What is a ride or die? Basically, it’s a product you cannot live without. The kind of product you’d choose if you had to choose just one. Left on a deserted island, limited space in your luggage, had to pack in a rush type of product. I’ve asked a few friends what theirs would be and I was surprised at the answers I got. Some can’t live without foundation, some concealer and some lipstick. I thought about what I truly wouldn’t or should I say couldn’t live without and I’ve narrowed it down to 3 things.

If you’ve read some of my previous posts you won’t be surprised by my first choice; highlighter. I am obsessed with highlighters and I love the glow it gives my skin. I wear it with and without other makeup, I use it as eyeshadow, on my décolletage and my shoulders. It’s a beautiful and versatile product.

Mecca Cosmetica Lit from Within Enlightened Powder

E.L.F. Baked Highlighter in Moonlight Pearls (left) and Blush Gems (right)

Next up are my brow products. It’s gotten to a point now where I feel a bit naked without my brows done. If I’m not planning on swimming, I will still generally do my brows even if I’m having a no makeup day. Brows help to define the face in my opinion and because mine are so sparse I feel like they give my face a bit more dimension and a better overall look when they’re done. My favourite brow products are the Eco Tools Spoolie, the Mecca Max Brow Guru Control Gel and the Maybelline Define & Fill Brow Satin in Medium Brown.

My last ride or die item is lip balm, specifically the Mecca Cosmetica Lip De Luscious in Peach Shimmer. I received this in a Beauty Loop box from Mecca in October and it is divine. It’s a beautiful peachy gloss, extremely hydrating and contains SPF 25, so perfect for me. I live in Australia and not only is it beautiful here but the sun is intense! I usually gravitate toward anything with SPF because I know I’ll be out in the sun for a good portion of my day. Here’s the catch, for a lip balm (and 10mL of it) it’s quite expensive. The kind of price I would normally baulk at for a lip balm. But, there’s always a but isn’t there, it is amazing. So good in fact that I plan on buying more shades, even with the slightly hefty price tag. It nourishes and hydrates the lips, even up to 24hr after application I can tell a difference to when I haven’t been wearing a lip balm for a few days.

So that’s my list of ride or dies. What are some of yours? I’m always so interested to see what other people think of as necessities and frivolities. Let me know in the comments below.

Until next time, Beauties xx

Standard

High End Holy Grails

Last post we covered the diamonds I’ve found at the drugstore. Today we’re delving into my holy grails from high end brands. As many of you might remember, I don’t mind at all paying for quality makeup, especially if it lives up to its claims. Below are some of my favourites.

Mecca Cosmetica Lip Deluscious in Peach Shimmer. This lip product is absolutely amazing. It’s a cross between a balm and a gloss. It nourishes and hydrates the lips and leaves them feeling silky smooth while also having a shine and but of peachy colour. I absolutely love it and plan on getting more shades from this range in the future.

Mecca Cosmetica Lit From Within Enlightened Powder. This is my favourite, stand alone highlighter. It can be used as a subtle highlight or built up for that glow to the gods type of highlight. I’ve mentioned it quite a few times already so I won’t go on about it, just know that it’s worth the money.

Up next we have the Hourglass Luminous Bronze Light bronzer. A perfect shade for lighter skin tones that want a dewy, glowing bronzer. Again, I’ve mentioned this too many times to count so won’t go on, but in my opinion it’s a fantastic bronzer.

Onto eyeshadows. My personal favourite is the Too Faced Chocolate Bar Palette. Fill of chocolate browns, pinks and purples and beautiful shimmers, it’s my go to palette. It isn’t a crazy, intense colour scheme, but for the looks I wear, it’s beyond perfect and I will definitely repurchase, assuming it’s still for sale when I finally hit pan.

Let’s talk blush. My fluorite high end blushes all come from the one brand, Hourglass. You really can’t go wrong with their powdered products, they blend beautifully, have great pigmentation and look amazing on the skin. Pictured below is the Ambient Lighting Blush in Mood Exposure.

My favourite foundation at the moment, and the one that keeps my skin looking great all day is the Artistry Youth Xtend Lifting Smooth Foundation in shade Natural. It isn’t a Mecca or Sephora brand, it’s purchased through Amway, but is still a high end price so i feel like it’s justified on this list. My skin doesn’t react to this foundation, it looks beautiful and applies effortlessly. Something I have already repurchased in anticipation of of my current one running out soon.

Lastly, the Mecca Max Brow Guru Control Gel. This stuff is legit. It helps tame unruly brow hairs without feeling heavy or thick, locks in the colour of brow products you’ve applied underneath and helps to encourage hair growth (or so I’m told) in areas of the brows that normally are difficult to grow hair. It isn’t too expensive, but is sold at Mecca, hence its place on the list.

And there, you have it. My High End Holy Grails. What are some of yours? Let me know in the comments below!

Until next time, Beauties xx

Standard

Drugstore Diamonds

As you all know, I don’t discriminate when it comes to the drugstore. Some products are, of course, duds but sometimes you find some diamonds in the rough. Here are the ones I reach for;

Covergirl Lashblast Volume Mascara. Someone once told me that it isn’t necessarily the formula of the mascara that’s important, but the wand. I have been using this mascara for over four years and I’m yet to find something else from the drugstore that I prefer over it. The wand is a rubber/silicone sort of deal, rather than a spoolie/brush style, and for me that makes a huge difference. I’ve included a picture of a brand new, never opened package so you can see the wand perfectly. It’s easy to use, doesn’t clump and because the brush has the flex that rubber offers, it’s easy to remove some product from the wand in order to ensure no clumps. I find that you can tell when a mascara is coming to the end of its life because it seems to clump more and more on the brush as it starts to dry out.

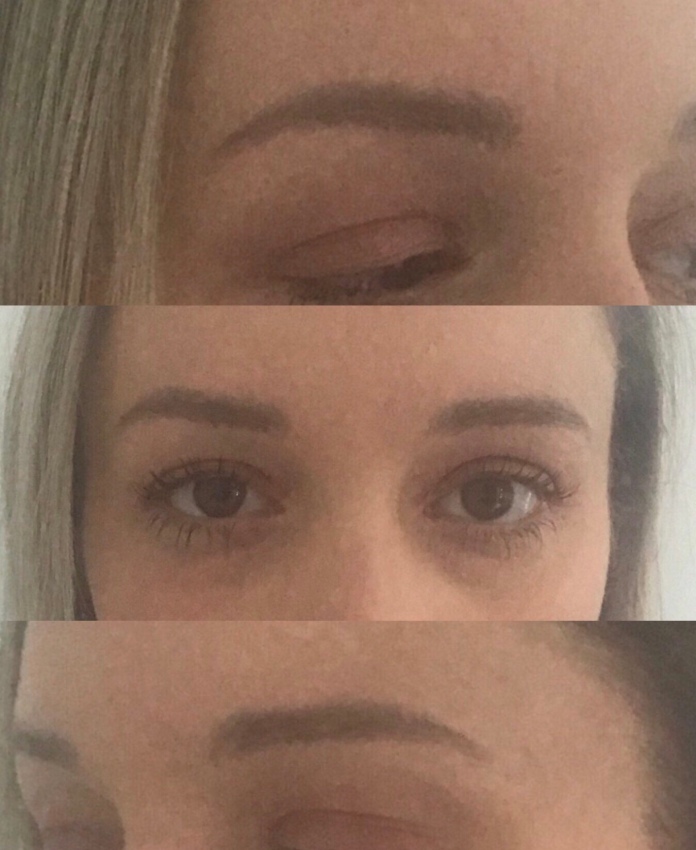
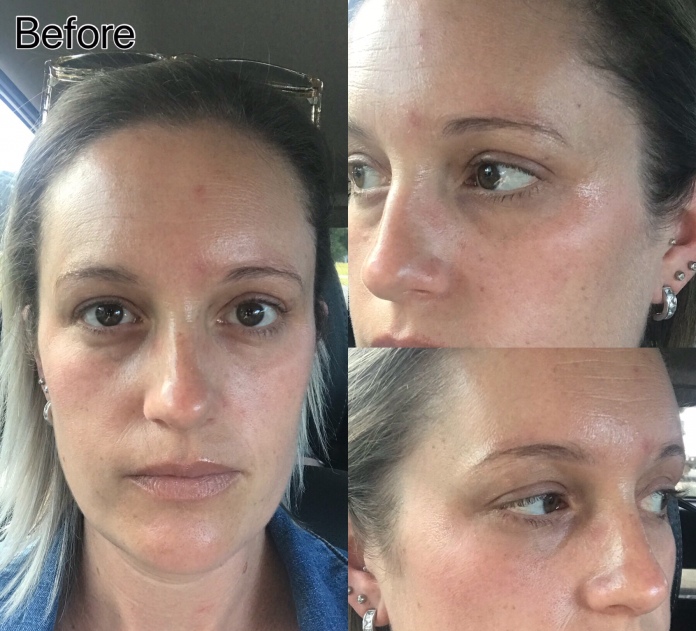
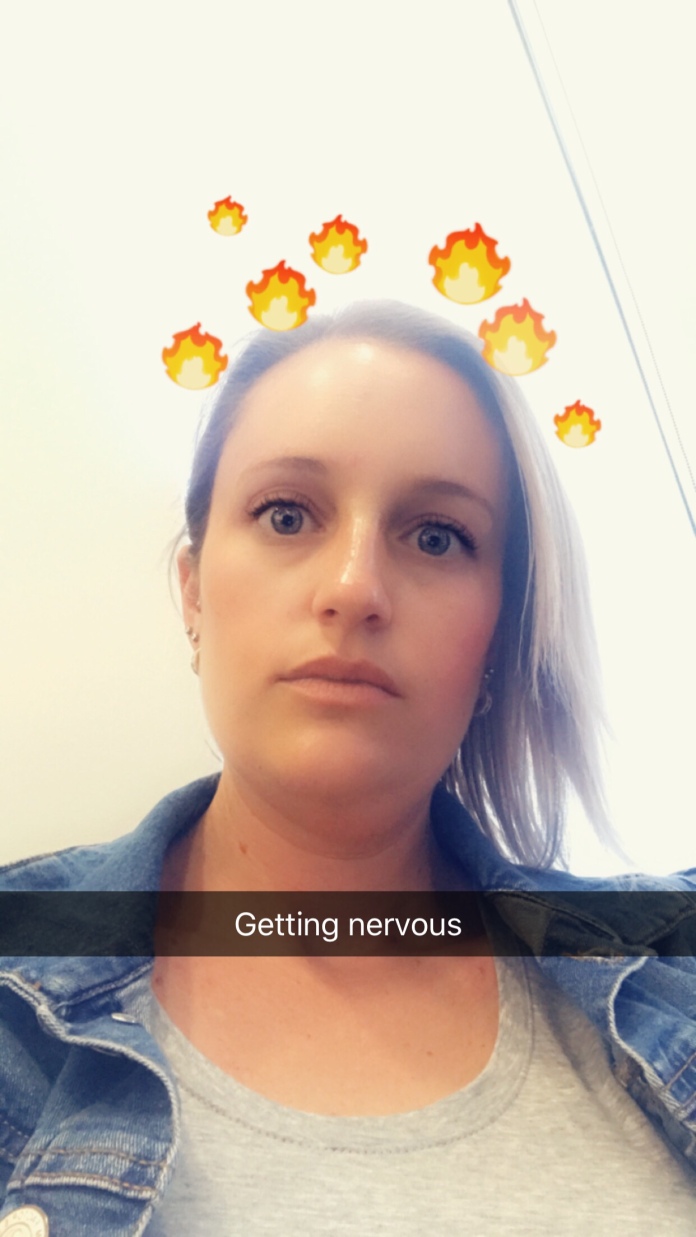
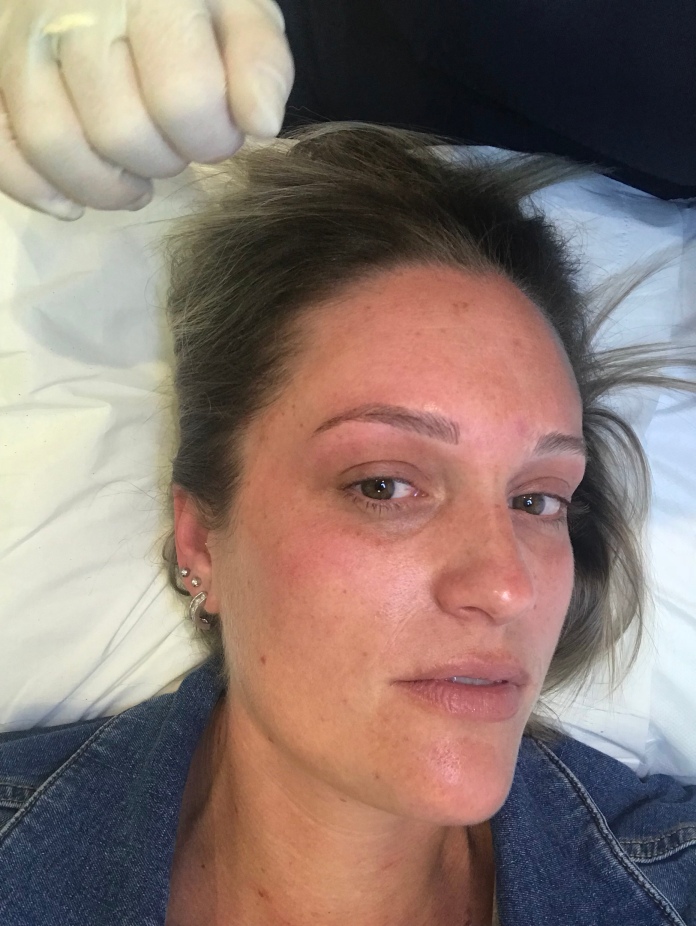
Maybelline Define & Fill Duo. This is my current go to brow product. I’ve yet to find something that works as well as this one does, is as inexpensive and a perfect shade match. It’s easy to use, pigmented and lasts all day. I would highly recommend it to anyone, especially a beginner brow-er (yes I just made up that word), because it is such a great product.

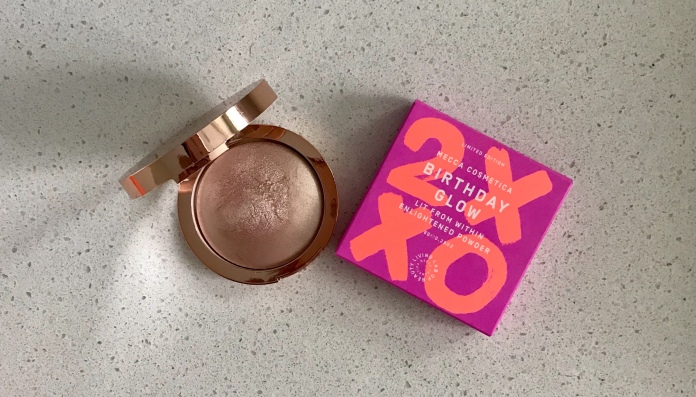
Physicians Formula MuruMuru Butter Bronzer. If you’ve read my bronzer post you’ll know this is one of my faves already. It’s buttery soft, the perfect shade for my skin tone and blends effortlessly. It’s subtle enough for beginners but can be built up for a really healthy glow. It’s a little pricey for the drugstore but for the amount of product you get and the quality it’s a definite winner!

Rimmel Provocalips 16HR Lip Colour. This lipstick is the absolute bomb diggity. It lasts the proclaimed sixteen hours, it’s the epitome of matte lipsticks and has a great shade range for my tastes. It doesn’t feel drying on the lips either, quite the opposite in fact. When I did a wear test with this lipstick I was so impressed I went and bought 4 more shades. I ate greasy food, drank from glasses and of course kissed and it didn’t transfer AT ALL!

Sukin Paw Paw Ointment. This is a handbag staple. I keep it on hand at all times and often wear it in lieu of lipstick with my everyday makeup. Because of my love for matte lipsticks my lips sometimes need some nourishment and this is my go to. It comes in a tube, another thing I love about it, so no dipping in and getting it under your fingernails or having to always carry tissues to clean off your finger after application.

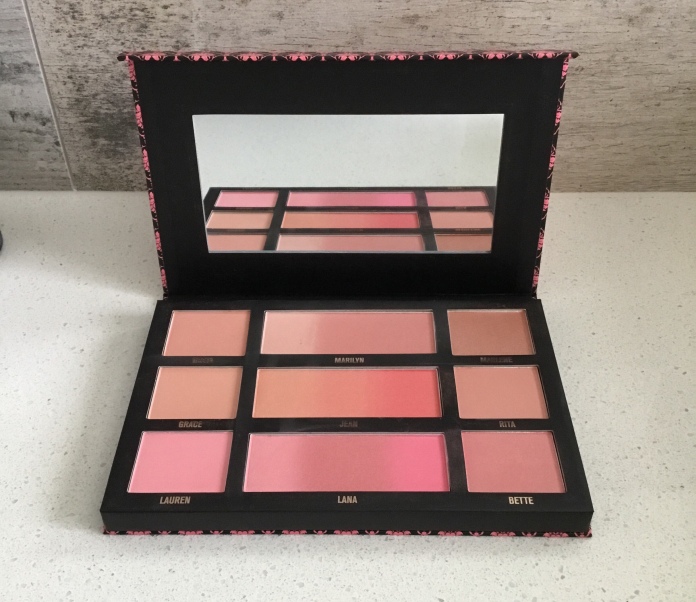
Chi Chi Cosmetics Ombré Blush. This one is another staple, for a few reasons. Most obvious (to me anyway) is the number of blushes you get for the price point. 9 in total, with 6 individual and 3 with an ombré effect. A must have for anyone but especially for someone new to blush. The shades are all beautiful and most importantly for beginners, subtle. Easily blended and buildable.

BYS Contour Stick and BYS Contour On the Go Palette. As most of you probably remember, I’m not a contour everyday person but if I was, this would be my go to product. It’s ridiculously inexpensive for the quality and amount of product you get and what I love about it is that it has cool undertones. I’m quite fair and find most contour products run to warm for me, but not this one. It’s a cream formula so those with dry skin will love it and easily blended without looking obvious.

Australis Translucent Powder. I love this powder to have in my little makeup kit in my handbag. It’s great for touch ups on the go and is available in loose or pressed powder. I prefer the pressed option for my handbag and also love it for setting the under eyes. It’s a white powder (hence the name translucent) so my only warning could be that it possibly causes flashback. I use a foundation that contains SPF so I’m unsure if it’s the foundation or the powder that causes the flashback.

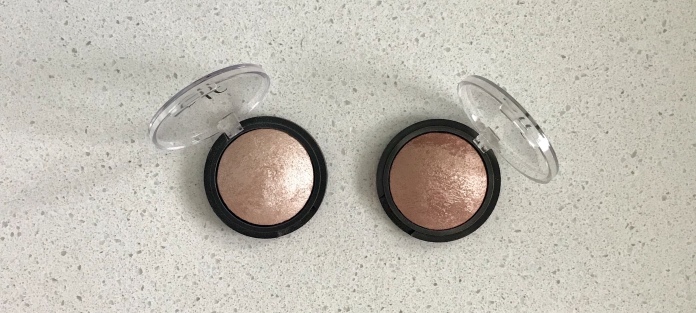
E.L.F Baked Highlighter. I love these highlighters. Beautiful finish, buildable and pigmented. My only criticism, as I said in my highlighter post, is the top layer that needs to be scraped off in order to get that gorgeous glow. For the price point and quality once you get past that layer, it’s totally worth it.

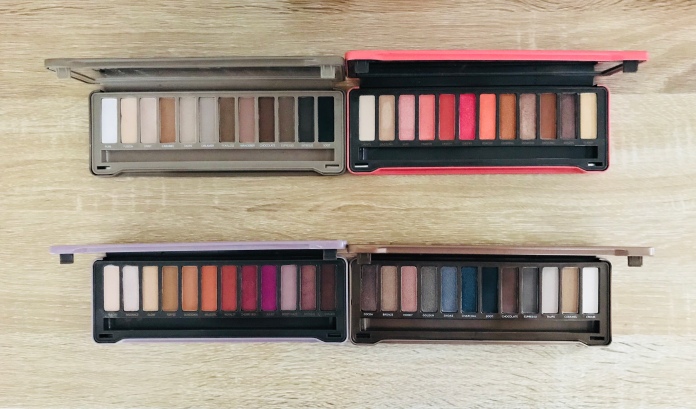
BYS Eyeshadow Palettes. I’ve got 4 of these palettes and I have to say, when I first got them I was new to the game and still dubious. Pictured below are (top row, left to right) the Matte Palette and the Peach Palette and (bottom row, left to right) the Berries Palette and the Nude 3 Palette. Each palette contained 12 shades, a mix of shimmer and matte (except obviously for the all matte palette) and I have to say, for the RRP they’re not bad! Sure, they could be slightly more pigmented, but they blend really well and are buildable. If you’re just starting out, I would definitely recommend these palettes.

Phew! There’s a lot I love from the drugstore; but I’m sure that isn’t a surprise to most of you. What are your favourite drugstore products? Let me know in the comments below.

Until next time, Beauties xx

Standard

Browdown, we have a Winner

Since I started wearing makeup there’s one thing that has been glaringly obvious. My lack of eyebrows. Let’s take a moment of silence for the early 2000’s when I over tweezed, tweezed too often and generally ruined my eyebrows. I’ve tried oils, serums and just letting them grow, they’ve never recovered.

Aaaand moment is over. They seriously look like sad little worms, not the luscious locks I see on Instagram. And because of my hair colour, applying foundation made it worse. Even when I attempted to avoid the area you could still see the hair caught by the brush, and absolutely no definition. I decided I needed to find a brown pencil/pomade/powder and get to learning how to get the eyebrows on point.

This is where I googled pictures, tutorials and blogs in the vain hope of finding someone, anyone, that could help me. Most that I found weren’t for me. They were either too ahem Sharpie looking, too fake looking or took skills I just don’t possess. And no offence intended to anyone who likes a strong brow, more power to you, it just isn’t the style I’m looking for. So I went with the method of measuring my face to get a general idea on where my eyebrows should sit. Cue the first problem.

About 5 years ago I suffered from Bell’s Palsy. For those of you that don’t know, it’s where your face is partially paralysed. I wasn’t able to take medication to fix it so I just had to wait it out. The entire right side of my face did not move for close to 3 weeks. Once the nerves began to receive the messages my brain had been sending everything went back to almost normal. The right side of my face droops ever so slightly, you wouldn’t notice if I didn’t point it out, but if you look closely, my right eye is more hooded and my eyebrow sits about 2mm lower than the left one.

I took this in my stride and accepted that for the most part my eyebrows would be more like half sisters than twins. My next issue was what product to use. After trying an array of different things – pomades, powders, tinted gels, angled brushes and even stencils, I settled on a pencil and powder combo. Pomade just isn’t for me. After that it was of course shade. Most I found were too dark or had a red undertone. My hair is a mousy brown and in some light can look grey (hence why I colour it) so I needed something with cooler undertones.

Enter the Maybelline Eyestudio Brow Satin Fill & Define Duo in Medium Brown. It is a perfect shade match, super affordable and easy to use. It is pigmented enough to give me the defined look I was after, but doesn’t set so quickly that I can’t fix mistakes. So I began practicing. The first few times (read: weeks) I was snap chatting my sister every morning with “Do these look ok? Even?” and after about 2 weeks of putting up with this she replied with “They look fine, like every other day I’ve told you!” I stopped the incessant messages immediately, best not to p*ss off the one person who puts up with your makeup chattering and I trust her judgement above all others. I mean, who else will honestly tell you if your muffin top is hanging over your jeans?

Now I can do my brows with ease and, dare I say it, get them even most days! Ah, how far I’ve come. I use an EcoTools spoolie to brush the hairs upwards, the pencil and powder combo and finish with the Mecca Max Brow Guru Control Gel. I love the pencil so much that I’ve actually bought several, just in case it’s discontinued and I have to find a different product. I’ve even braved the interwebs and added some photos of my face and brows before and after product. Let me know what you think! Do they look natural? Good colour match? Am I delusional?

We love a good Snapchat filter in our house 🙂 I hope everyone had a wonderful Christmas!

Until next time, Beauties xx

Standard